Pick a project!

Knitting a baby blanket at the start of lockdown was great as it really gave me something to focus on and keep me emotionally and mentally level. Since then, my creativity has been all over the place as I’ve struggled to focus on any one thing for very long. That’s not to say I haven’t been creative, it’s just that it’s been channelled in so many different directions that I don’t have much in the way of anything finished to show for it.

We’ve made some progress with our study, which we’ve been working on for about 3 years now! Mr Jack is using it full time for work now, but at least he has a good desk to use. We’ve also put up a bookcase in there which is intended to house as much of my crafty stuff as possible, sewing machines, fabric, notions, yarn, knitting and anything else you can think of.

Speaking of sewing, the boys and I enjoyed watching the Sewing Bee together this year, and as a result I’ve started following more sewists on Instagram, and discovered The Fold line website and its related Facebook group which is such a helpful resource.

I have lots of fabric lined up for various projects which have never quite made it to the cutting board. I’m hoping I might work my way through a few of them, but it’s hard to find the space to lay everything out when everyone needs the table for school work and activities and family meal times.

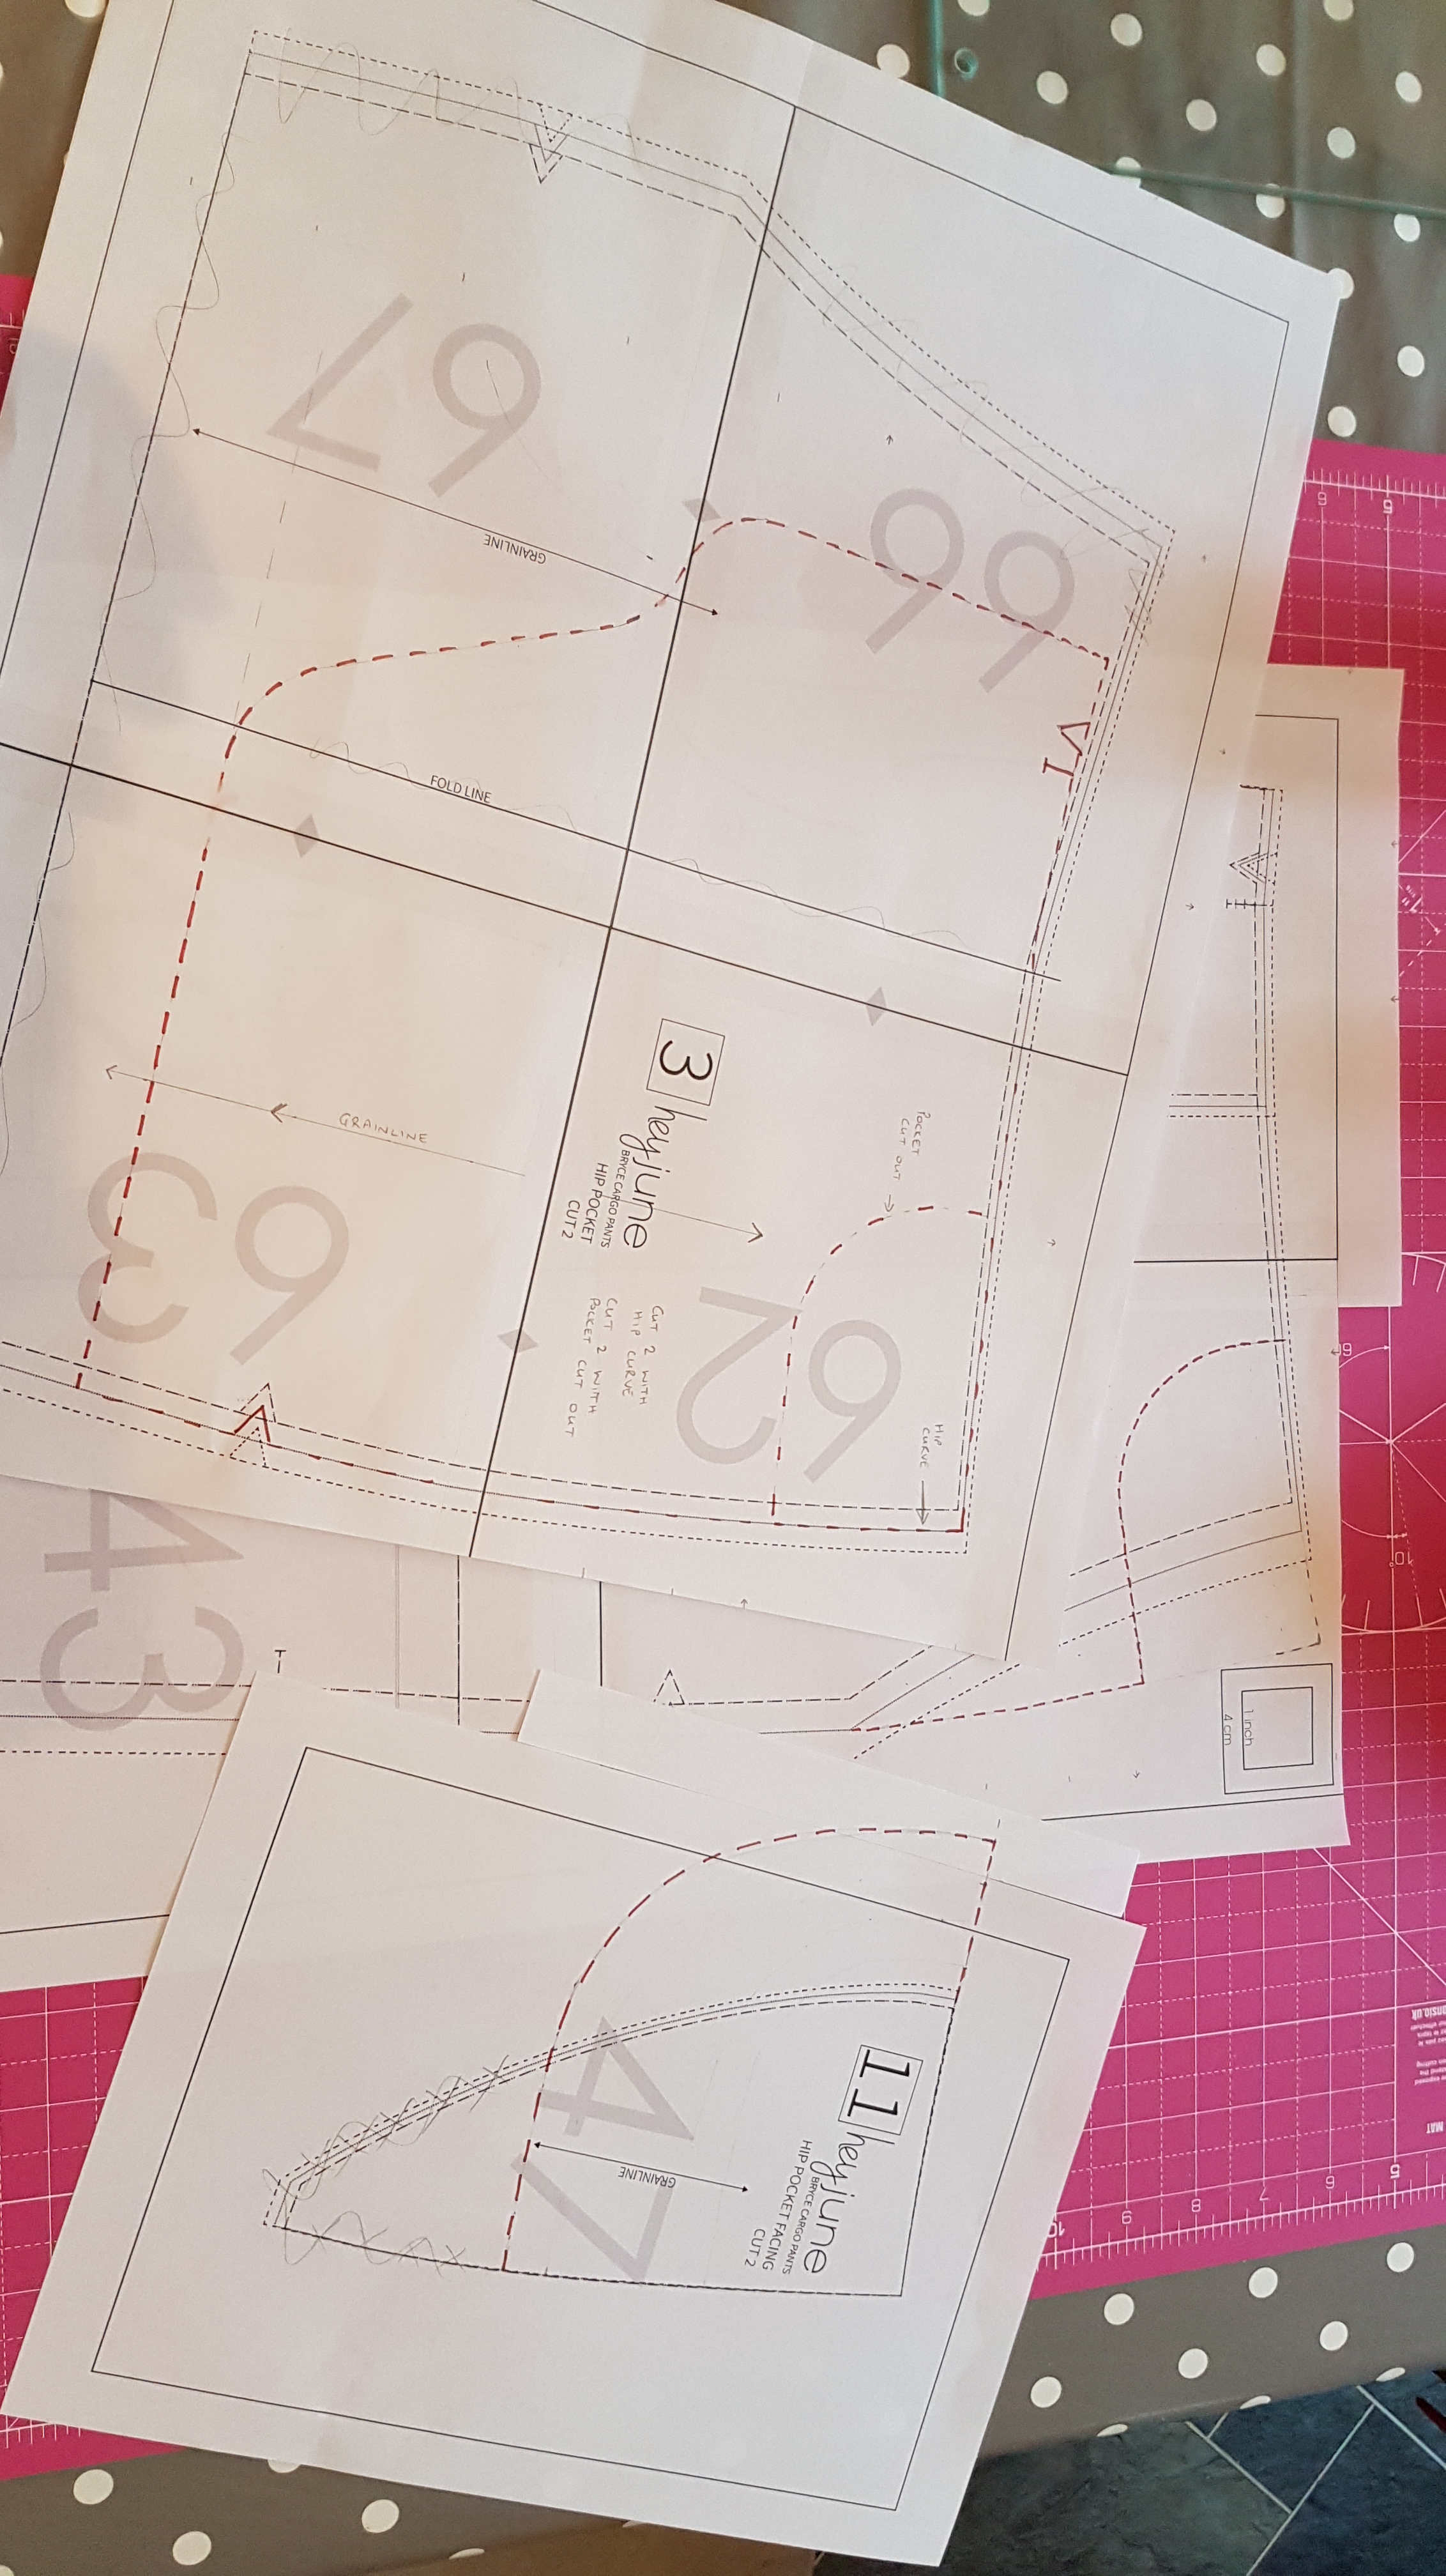
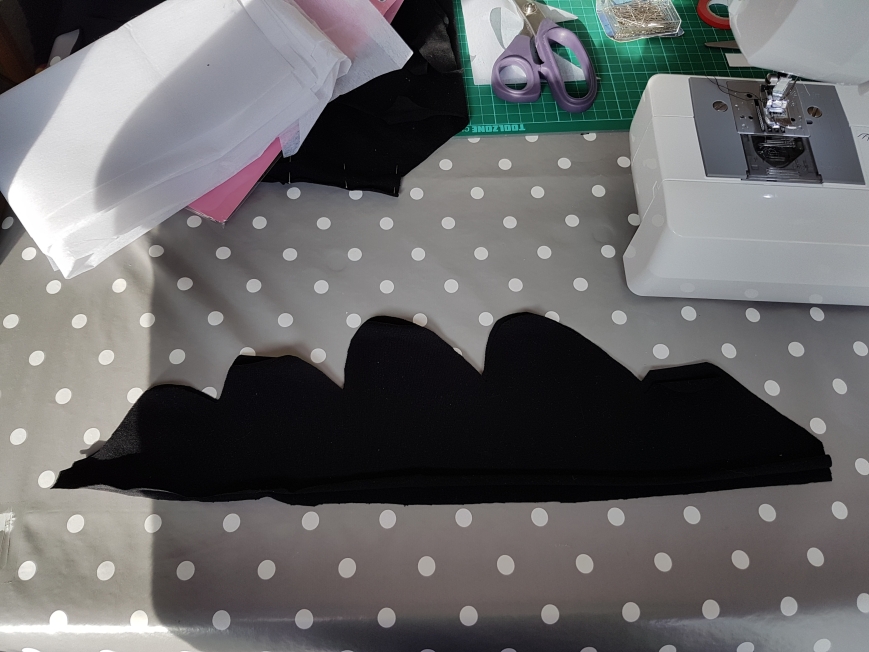
I have managed to produce a pair of Hudson pants which, while far from perfect (they may yet make their way back to the sewing machine for some alterations) have been a welcome addition to my lockdown wardrobe. Next up will be an Ogden cami using a black and green rayon challis.

I have of course also made a few face masks, but need to churn out a few more now that they’ve been made compulsory in shops here from next week.

I’ve enjoyed watching a few gentle TV programmes, including The Repair Shop where professional craftspeople lovingly restore precious family heirlooms and items of sentimental value to their owners. And I’ve taken inspiration from Your Home Made Perfect, where two architects use virtual reality to showcase their designs for the remodelling of people’s homes.

I’ve been learning how to use SketchUp, a computer aided design programme, which will be useful to me for my job, but has proved brilliant for helping me redesign my living room, for which I’ve had ideas rumbling round my head for a couple of years now, but have previously been unable to pin down to a coherent overall plan. It’ll be another long term project to get it all done, but we’ve already started working on it.

Then there’s the kitchen. We’re not making any drastic changes, just adding in one new drawer unit and moving an under-counter shelf unit around, but it’s been anything but straightforward to do. Why is it that the jobs you think will be easy almost never are!?

There’s been homeschooling and school related projects, growing veggies, planning woodworking projects, (I miss work and power tools!) and Pumpkin is desperate to build a go kart.

Amongst all of these, and other projects I have still been knitting, very slowly, a pair of socks for Pumpkin, the pattern for which had been in my Ravelry queue for several years. This week I finally cast them off, completed the detailing and sewed all the ends in. It does feel good to finish something!

20200715_221425


Rip!

I stalled for some time on my trousers. Partly because I just haven’t had a clear stretch of time to warrant getting everything out and spreading out, and partly because I triple stitched a couple of seams before making a modification I’d intended to. I spent a long time debating in my head whether there was another way to do it, or whether to abandon the idea altogether, but eventually came to the conclusion that since the modification was largely the point of making a second pair, and there was no other way to do it well, I should just bite the bullet and rip the seams out. So I did.

20190730_154112

I used my new seam ripper for the first time (Mothers Day gift from my boys) and it was like a hot knife through butter, so the seam ripping was so much easier than I anticipated. These things usually are, especially if you’ve spent months agonising over how much of a pain it will be!

Now I’ve just got to figure out how this modification will actually work.

Getting on with it

I have, at long last, had a day off! One day of absolutely nothing except the school run yesterday, on which I chose to rest completely. I watched The Phantom Thread (somewhat odd film, though beautiful) and then fell asleep with the cat on the sofa. I finished reading my book (The 1,000 year old boy) and watched some TV with Mr Jack. Perfect!

Today, feeling a little more rested, was a day of getting on with it. Despite my fabric disappointment the other day, I do still have enough of the same stretch denim I used before to make a second pair of trousers. I’ve been pondering the alterations for some time and hesitating to commit them to the scissors, so I made the decision to just get on with it. I finished the redrafting without agonising over every detail and cracked on with cutting out.

I only had time to cut one front and one back leg piece, but I’ve made a start and it feels good! And I have another day off tomorrow to continue. Bliss!

Buzzkill

You know when you spend hours browsing a website and filling and amending your shopping basket, and that small buzz of excitement when you finally place the order.

And then the thrill when the package arrives in the post and the hum of anticipation as you have to wait for a more convenient time to open it.

And then the slight sink of disappointment when half of the things you ordered turn out to be not quite what you imagined and so you’re almost back to square one on a project.

That.

Clockwise from top left:

1. Clearance fabric that I thought would make a nice top, but is much more open weave than I expected. Plain green crepe intended as lining for said top. Hopefully I’ll still be able to do something with it.

2. Star print cotton fabric for future pocket linings.

3. Popper fasteners kits, D rings and bias binding for work trousers project.

4. Samples of fabric for work trousers, cotton drill in medium- and heavy- weight, both of which are not as heavy weight as I’d expected. And one I’d hoped would be a tough fabric for knee pad pockets is more like a lightweight tent fabric.

5. A variety of zips at clearance prices. Many are a bit shorter than I expected, despite ordering by length!

So, I’m not really any further with my work trouser project, but I’m sure the above will be used one way or another!


Pant-o!

I made my first pair of trousers! Oh yes I did!

They were done in time to wear them for crewing the Panto at work, which was just as well, since my previous work jeans acquired some extra ventilation in the knee department a few shifts into the run of the show. For any non-Brits around here, panto, or pantomime is a very silly theatrical tradition, which is very serious business around this time of year. Personally, I’ve always hated panto, but I’ve seen it in a different light this year, and being backstage has been an absolute blast!

Anyway, trousers.

The Bryce Cargo pattern from Hey June Handmade was a great starting point. The PDF pattern was super easy to print and piece together, and the instruction booklet was excellent. Well laid out and easy to follow.

I made several modifications to the original pattern, including redrafting the front pockets from hip-slash to jeans-style, and changing the pocket bags to a pocket stay, omitting the pocket flaps from the back pockets (and the leg pockets, though I hadn’t intended to) and redrafting the lower leg to be longer and wider.

20190107_182320

The finished trousers are not without their flaws, but are perfectly serviceable for the job. I now want to make a second pair and eliminate some of the imperfections of the first.

The front pockets are fab. I might be tempted to modify the depth of the pocket bags, but the redraft worked very well, the openings are a good size and the pocket stay gives extra structure to the front of the trousers.

The back pockets really don’t need a flap, but the jury’s out on the cargo pockets. I quite like them as they are without a pocket flap, but I think they may look better with one. I intended for them to have a flap, I even made them up, but sewed the buttonholes a little too small for the buttons and couldn’t be bothered to redo them. They were also quite bulky once folded over and possibly a fraction too short, and I thought the buttons might stick out a little too much and be prone to catching on things when shifting stuff about at work. At the stage that they were due to be attached, I was worried about the overall fit of the trousers – they looked like they might come up too small, so I wanted to get the leg seams at least basted so I could check the fit – so I thought I’d leave the pocket flaps and come back to them later. Of course, once I’d sewn the leg seams, it was then impossible to sew the flaps without ripping everything out again! So they got left off. I think next time I would cut them maybe 10mm longer than the pattern piece and try again with the buttonhole, or perhaps go for poppers instead.

The biggest problems with these trousers is the fit and the length. Both of which are my own fault. Firstly, I need to trust the seam allowances. That would go a long way to sorting out the slightly baggy fit at the waist/hips. I may also do a bit of a fit diagnostic on the rise before I go again. Secondly, I need to get someone to help me measure my legs as it’s very difficult to do it yourself. I added half an inch above the knee, which is about right, but I only added one and a half inches below the knee to take it from a calf length to a full length trouser leg. And I’m tall! I think an additional two inches would not go amiss, and even that is possibly too little. I think I’d also flare the leg out a bit further for preference.

Both of my female colleagues have admired them and even requested a pair already. I’m sorely tempted to oblige them, as i know women’s workwear is hard to come by, but I’m definitely making myself a second pair first.


Chop chop

Yesterday I paid a visit to my local yarn (and sewing) shop to pick up all the notions I need. They dont have much in the way of dressmaking fabrics, but they have a fabulous selection of quilting cottons with all sorts of fun prints.

20181106_125052

I chose one of these for my pockets – can you guess which one?

Today I have been placing, tracing and cutting out all of my pattern pieces. My many many pattern pieces! I’ve even omitted a few – I dont need pocket flaps getting in my way on my back pockets – but there was still a vast number of pieces. But they’re all done, and I’ve used almost a metre less fabric than the pattern stated, so I’ve got plenty left for another pair if I like these, or something else if I don’t!

I’ve started finishing the edges of the first few pieces using my overlocker this evening. I’m not going to have time to work on it for a few days now, but I’m pleased with progress so far. Next up will be the mindtangling process of assembling the pockets and getting everything to end up facing the right direction!

Pattern piecing

Today I assembled and started adjusting my pattern. The instructions for this pattern are very comprehensive and easy to follow. The taping took a little while to do, but was very straightforward.

The modifications took rather longer to get my brain around. The pattern contained instructions for modifying the pattern from a hip slash pocket to a jeans style pocket, which i thought would be more secure for keeping things in. I also used this tutorial for the Closet Case Ginger Jeans pattern to make a front pocket stay to give more structure and support across the front of the trousers. Modifications marked in red.

20181105_145850.jpg

Next up, i need to adjust the length and width of the lower leg to give more of a regular jeans fit. That’s a job for tomorrow, along with a trip to the local yarn and haberdashery shop for all of the notions I need – zip, buttons, and some funky cotton to make a secretly fun pocket lining!

Oh pants!

I need new trousers for work. I’m a theatre technician, so I need something practical, hard-wearing and with plenty of good size pockets. Oh, and preferably in black! I’ve been wearing an old pair of black skinny jeans in a thick denim up til now, but a.) they’re getting a bit snug and b.) I’ve got a lot more shifts than usual coming up (yay, panto season!) and so I need an extra pair to tide me over while those are in the wash.

At the Knitting and Stitching Show, I found some black denim on clearance and bought 4 metres. I also picked up a pattern for some men’s cargo trousers that was close to the style I had in mind.

20181102_105818.jpg

This week I sat down to start making them and spent an age trying to figure out what size to make as I gradually came to realise my mistake – a woman’s waist is a totally different shape than a man’s. I then spent ages comparing the pattern against a women’s trouser pattern (of a completely different style) and then against some of my existing jeans to work out if i could modify the waist, before concluding that I just needed an entirely different pattern.

So I have trawled and trawled every pattern site imaginable and yet still cannot find a pattern that matches what i want to make. I did find an amazing template of a pair of cargo/jeans that were exactly what I was after but it turned out to be a graphic design image template, not a sewing pattern. Gutted.

I toyed with the idea of using the Ginger Skinny Jeans pattern from Closet Case patterns, but in the end, after a bit more googling, I found these Bryce Cargo Pants by Hey June Handmade. The picture isnt great. They’re more fashion style-y than practical looking, (and i certainly won’t be rocking up to work in high-heeled open-toed sandals) but the waist looks about right for what i want, which is the most important bit in terms of a pattern. They’re definitely too short, and a bit too fitted around the lower leg for my liking, but i figure it’ll be easier to modify a leg than a waist!  It comes as a pdf pattern, so no hanging around waiting for the post, and i think I’ll feel a lot less precious about chopping and changing the pattern, since i know i can just print it again if needs be. Mind you it’s about 30 pages, so took an age to print, and i still need to assemble it, but thats a job for another day.


IMG-20181103-WA0013

I’m still very much a novice when it comes to sewing, so i have no idea how this is going to turn out, but I’ll do my best and keep you posted. It could be an interesting challenge.

Right, where’s my sellotape?

Here’s a llama, there’s a llama

Well, I seem to be on a roll. I’d not been allowing myself to start any other projects until my Crazy Stripes cardigan was finished, but I had plenty of projects lining up in the wings.

You may remember this little pile of goodies from this year’s Knitting and Stitching Show.

20180303_225809

Well, in just three days, and with the help of my shiny new Singer overlocker, that llama fabric has become this.

20180922_221903

I added about an inch in length to the body at the tracing stage. Otherwise it’s the same as my previous pink one from the same pattern, though I possibly used less of the seam allowance as I was nervous about the overlocker blade slicing too much off the edges. I wpuld potentially attempt to alter the neckline so it’s not quite so wide, were I to make this top again. But in general, I’d say I’m pretty pleased with this make.

Now, what shall I make next?

Toothless flies again

Those of you who have been around for a while may remember the Toothless cake that I made for Pumpkin’s birthday a couple of years ago. He still loves How To Train Your Dragon, both the books and the TV series, so of course, having been Hiccup last year, he requested to be Toothless for this year’s World Book Day.

Toothless

Despite him giving me plenty of notice of his character choice, I of course left everything to the last minute and was only saved by the snow which caused the dress up day at school to be postponed by a week. In the end I still cut it ridiculously fine, sewing in the morning while the boys ate breakfast and pinning the wings on him as we went out of the door!

20180301_142858

I bought a plain black hoodie and jogging trousers as the basis for the costume. I marked out and cut a straght line up the back of the hoodie to insert the dragon spines.

I drafted pattern pieces on paper for the spines and cut them out of some leftover black jersey and used a bit of iron on interfacing to stiffen them a little.

20180329_113022

For the head of the dragon, I drafted the ears/horns on paper and again cut them from black jersey and padded them a little to get the right shape and make them stand up a little, and hand-sewed them in place on the top of the hood.

20180329_112956

I found some perfect green cotton fabric at the Knitting and Stitching Show to make Toothless’ cat-like green eyes. I googled to find out the best way to do the pupils and hand-stitched them using black embroidery thread and a satin stitch and was very pleased with how they turned out. I edged them with black jersey to help define the eyes and make them a bit more 3D and stand out a bit more and then sewed them onto the hood.

20180329_113048

The tail was the tricky bit. I didn’t want it attached to either hoodie or trousers as I thought it would get in the way, so I made up a simple belt using some fabric tape I had in my sewing box and a couple of hook and eyes. The tail itself was a long triangle of black jersey. I considered adding some spines down the tail but decided it was a bit fiddly and probably unnecessary, not to mention I was rapidly running out of time. I had just enough black jersey left to make one of the tail fins and cut up an old red T-shirt to make the other fin. I pinched a bit of fusible fleece from my lovely bestie to give them a bit of structure and filled the tail out with toy stuffing.

20180329_113602

A pair of wings was hastily chopped from a bin bag and safety pinned either side of the spines. It was a quick fix but they actually looked quite good, giving a bit of different texture, and I wasn’t worried about them getting snagged on things during the day.

With more time I probably could have improved on it a bit more, but as it was, I was happy and he was happy.

20180329_120241.jpg